Easy Guide to Configure Social Login APIs in OpenCart
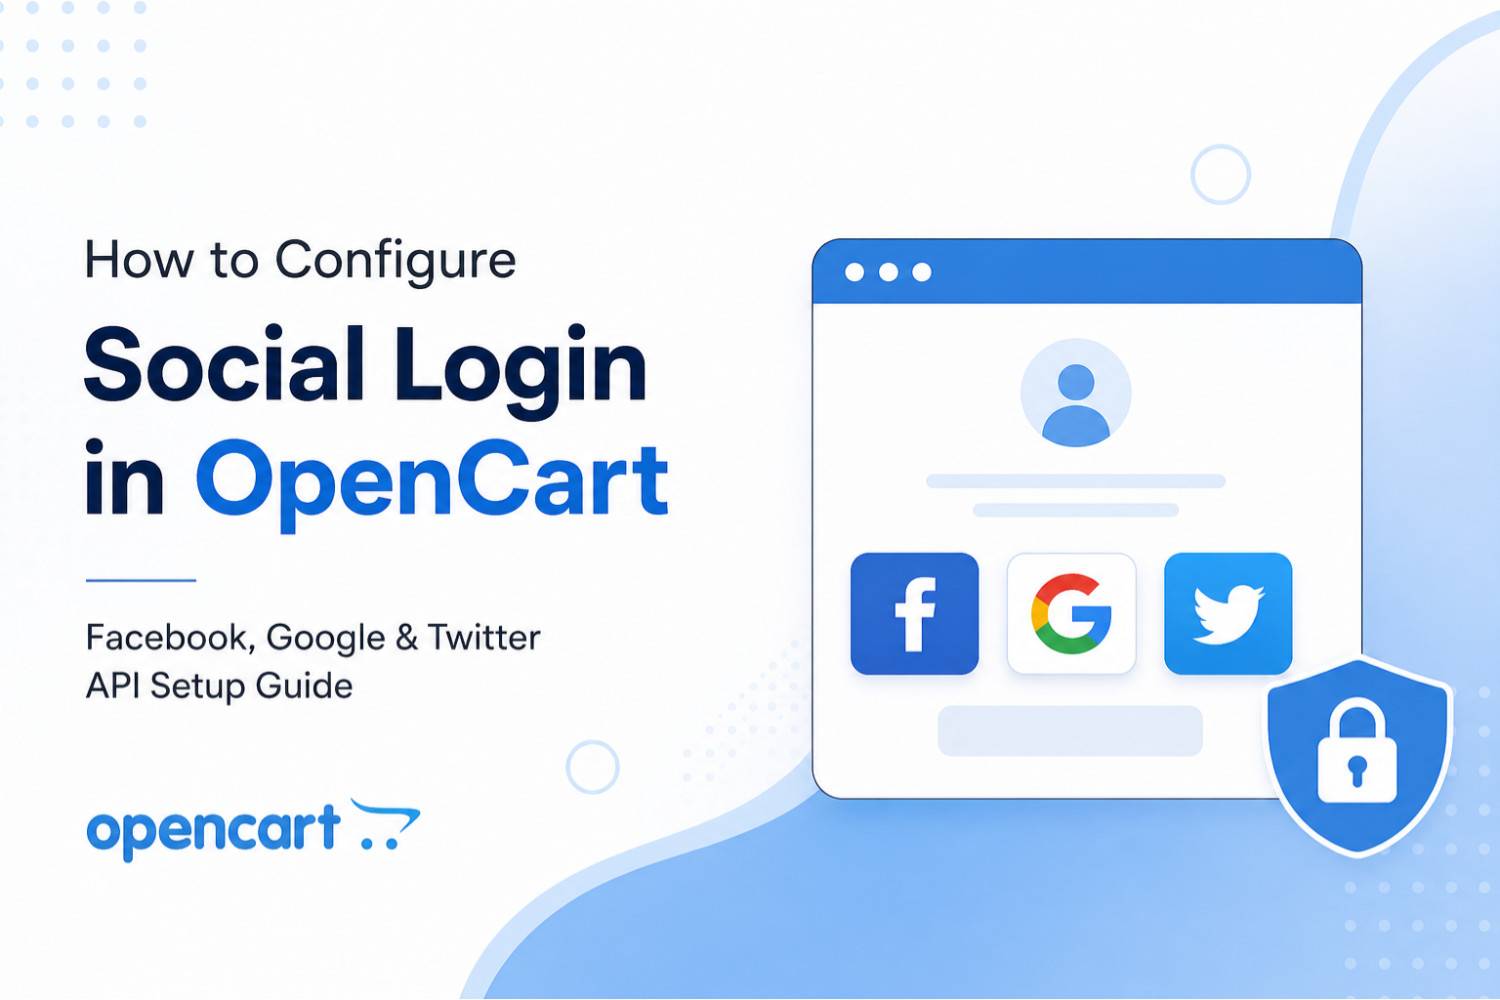
Social Login allows customers to quickly log in to your OpenCart store using their Facebook, Google, or Twitter accounts. This improves user experience and helps reduce registration time.
In this guide, we will explain the simple setup process for Facebook Login, Google Login, and Twitter Login APIs in OpenCart.
Facebook API Setting
Step 1: Create Facebook Developer App
Open the Facebook Developer website:
https://developers.facebook.com
Now follow these steps:
- Click My Apps
- Select Create App
- Choose Consumer
- Enter App Name and Email
- Create the application
(Get More Information About the OpenCart Social Login Extension)
Step 2: Add Facebook Login
Inside the Facebook App dashboard:
- Click Add Product
- Select Facebook Login
- Choose Web
- Enter your website URL
Step 3: Configure Redirect URL
Open:
Facebook Login → Settings
In the field:
Valid OAuth Redirect URIs
Paste the redirect URL provided by your OpenCart Social Login extension.
https://yourwebsite.com/index.php?route=extension/module/sociallogin/facebook
Step 4: Copy API Credentials
Open:
Settings → Basic
Copy the following details:
- Facebook API Key (App ID)
- Facebook API Secret (App Secret)
Step 5: Configure in OpenCart
Go to:
OpenCart Admin → Social Login Extension
Enter:
- Facebook API Key
- Facebook API Secret
- Status → Enabled
Save the settings.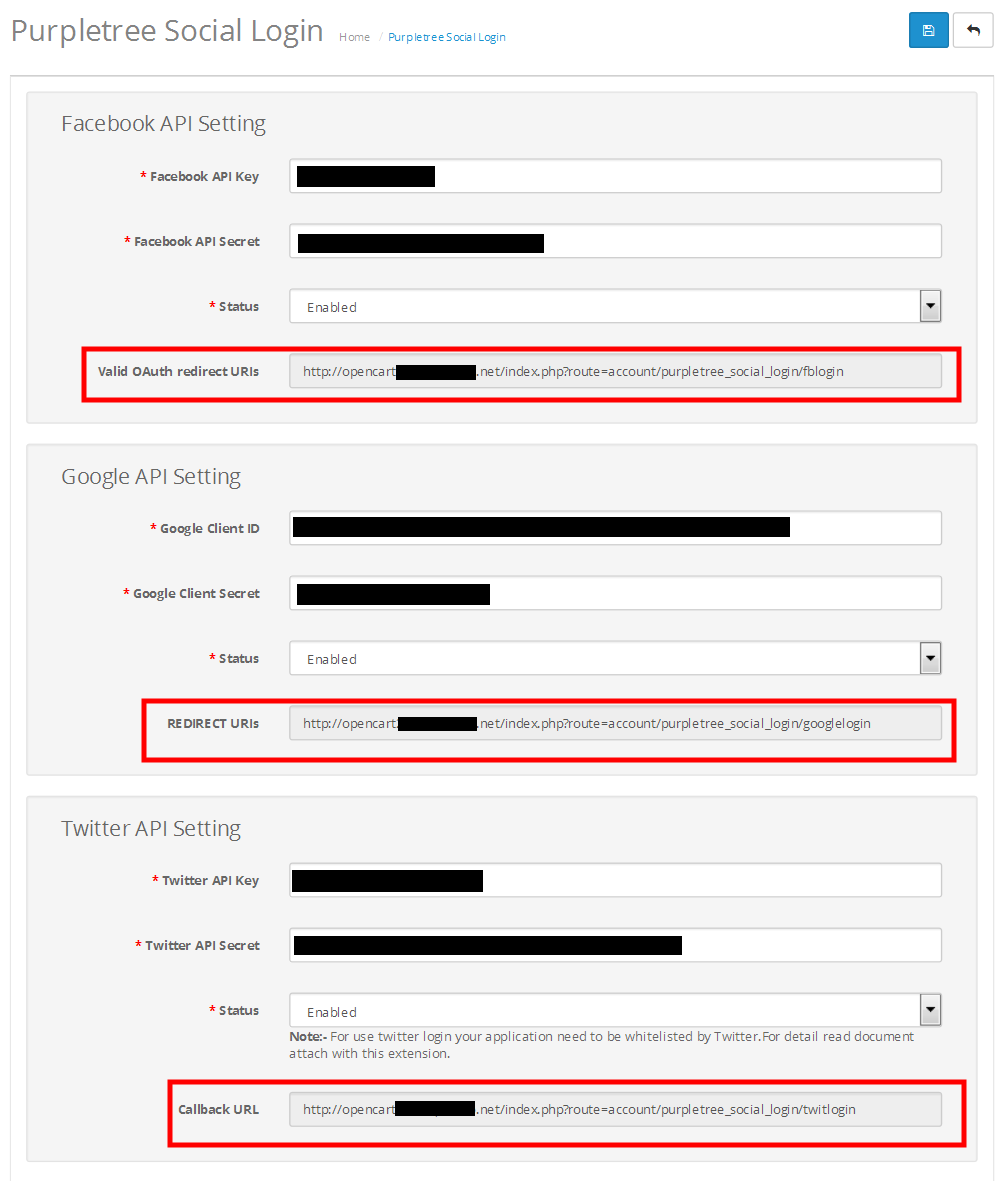
Google API Setting
Step 1: Open Google Cloud Console
Visit:
https://console.cloud.google.com
Create a new project.
Step 2: Configure OAuth Consent Screen
Open:
APIs & Services → OAuth Consent Screen
- Select External
- Enter App Name
- Add Support Email
- Save settings
Step 3: Create OAuth Client ID
Open:
APIs & Services → Credentials
Click:
Create Credentials → OAuth Client ID
Select:
Web Application
Step 4: Add Website URLs
In:
Authorized JavaScript Origins
https://yourwebsite.com
In:
Authorized Redirect URIs
Paste the redirect URL from your extension settings.
https://yourwebsite.com/index.php?route=extension/module/sociallogin/googlelogin
Step 5: Copy Client Details
Copy:
- Google Client ID
- Google Client Secret
Step 6: Configure in OpenCart
Open:
OpenCart Admin → Social Login Extension
Enter:
- Google Client ID
- Google Client Secret
- Status → Enabled
Save the settings.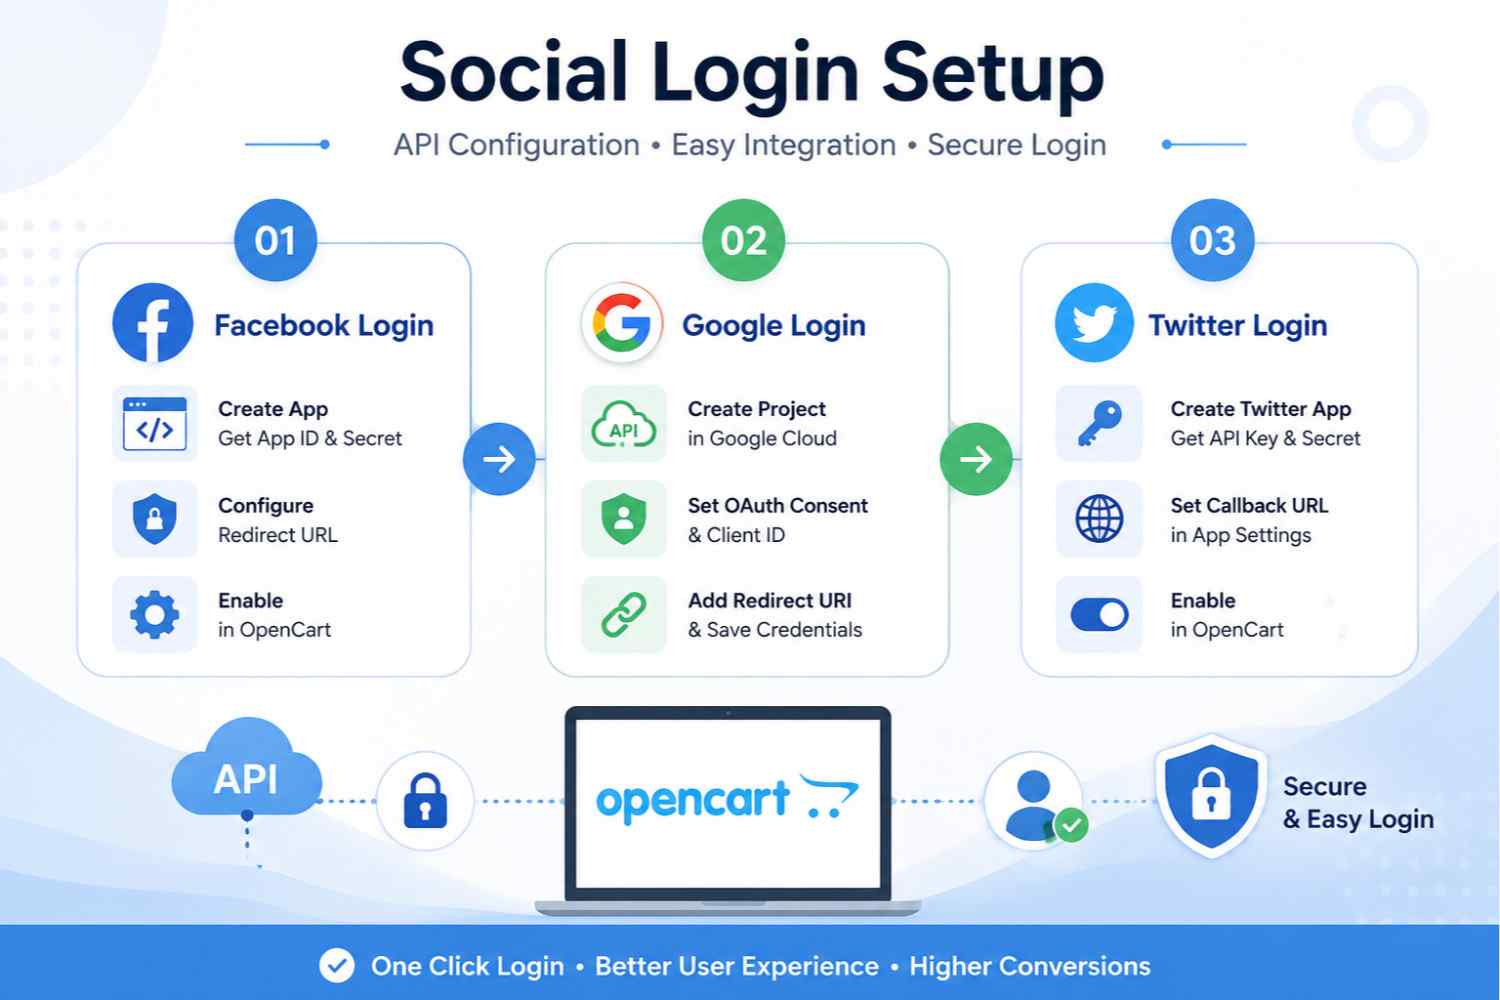
Twitter API Setting
Step 1: Create Twitter Developer Account
Visit:
Create a developer account and create a Twitter App.
Step 2: Configure Callback URL
Inside your Twitter App settings:
Callback URL
Paste the callback URL provided by your OpenCart extension.
https://yourwebsite.com/index.php?route=extension/module/sociallogin/twitterlogin
Step 3: Copy Twitter API Credentials
Copy:
- Twitter API Key
- Twitter API Secret
Step 4: Configure in OpenCart
Go to:
OpenCart Admin → Social Login Extension
Enter:
- Twitter API Key
- Twitter API Secret
- Status → Enabled
Save the settings.
Important Notes
- Always use HTTPS URLs.
- Redirect URLs must exactly match extension URLs.
- Incorrect redirect URLs may cause login errors.
- Twitter Login may require application approval.
Benefits of Social Login
- Quick customer registration
- Better user experience
- Faster checkout process
- Reduced password issues
- Mobile-friendly login experience
By properly configuring social login APIs, you can provide a smooth and professional login experience for your OpenCart customers.