OpenCart 4.x Extension Installation: A Step-by-Step Guide for Seamless intsallation

The process of installing OpenCart extensions on version 4.x.x.x is distinct from the previous installation methods used in OpenCart 3.x.
This guide is applicable to all OpenCart 4.x versions, including 4.0.0.0, 4.0.1.0, 4.0.1.1, 4.0.2.3, and 4.1.0.0.
Please note: For larger extensions such as Multi-Vendor or Web-to-Print, the progress bar may take 3–4 minutes to change to blue after uploading. Please be patient and do not refresh or close the browser during this time.
Installation Steps for OpenCart Modules on Version 4.x
Follow these steps to install any OpenCart module or plugin:
Step 1: Log into your Admin panel. Go to Extensions > Installer. Click to upload the extension/module file.
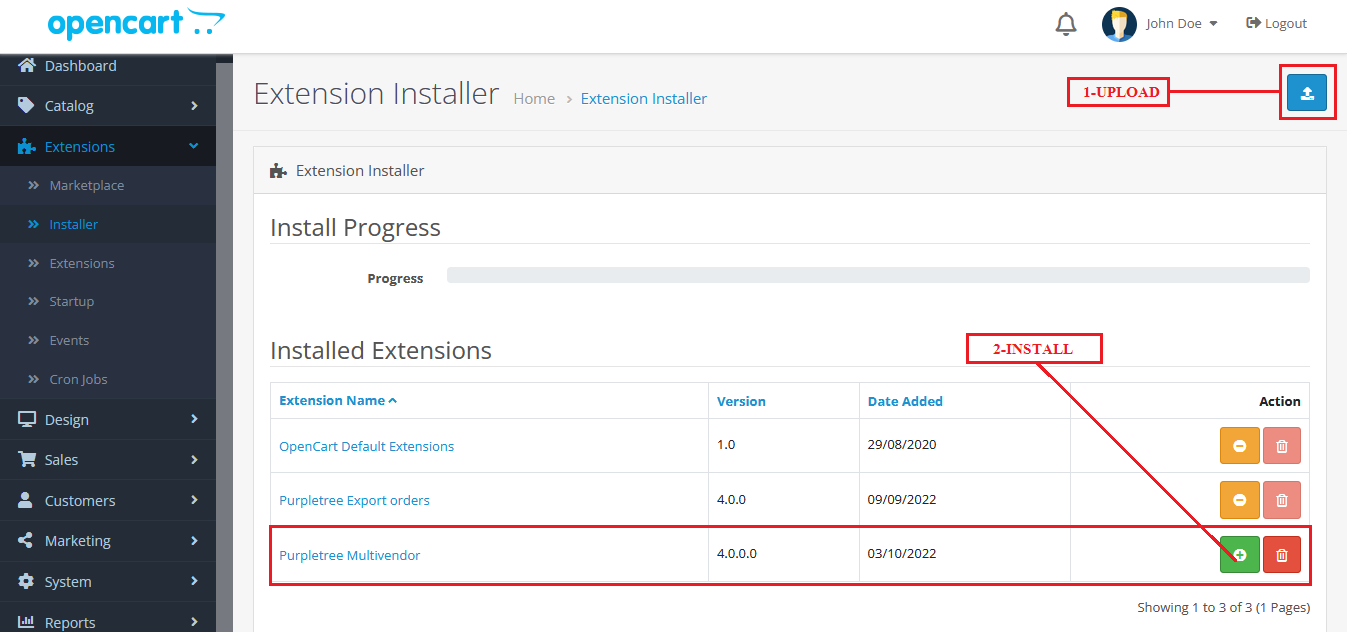
Step 2: After uploading, click the green plus icon to begin installation.
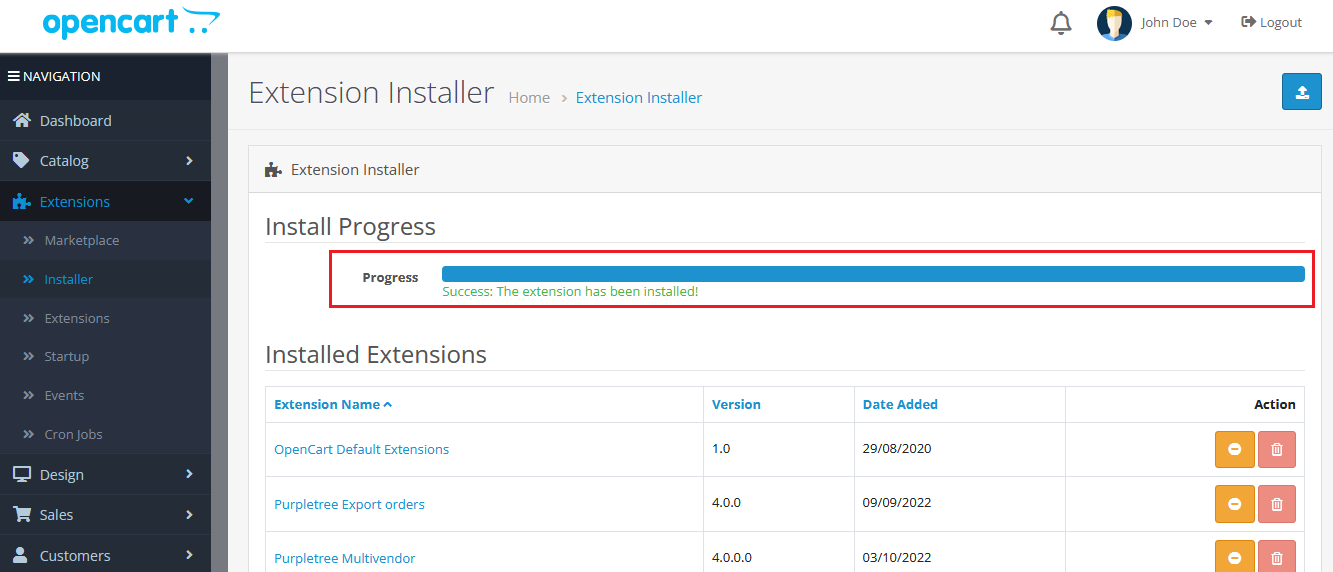
Please allow the full process to complete. The progress bar will turn blue during installation. This may take a few minutes—do not refresh or navigate away.
Step 3: Once the progress bar turns green and a success message appears, the extension is installed. Wait for this message before continuing.
Step 4: Go to Extensions > Extensions and select the appropriate module type (e.g., Module, Shipping, Payment).
You can now configure settings for the installed extension.
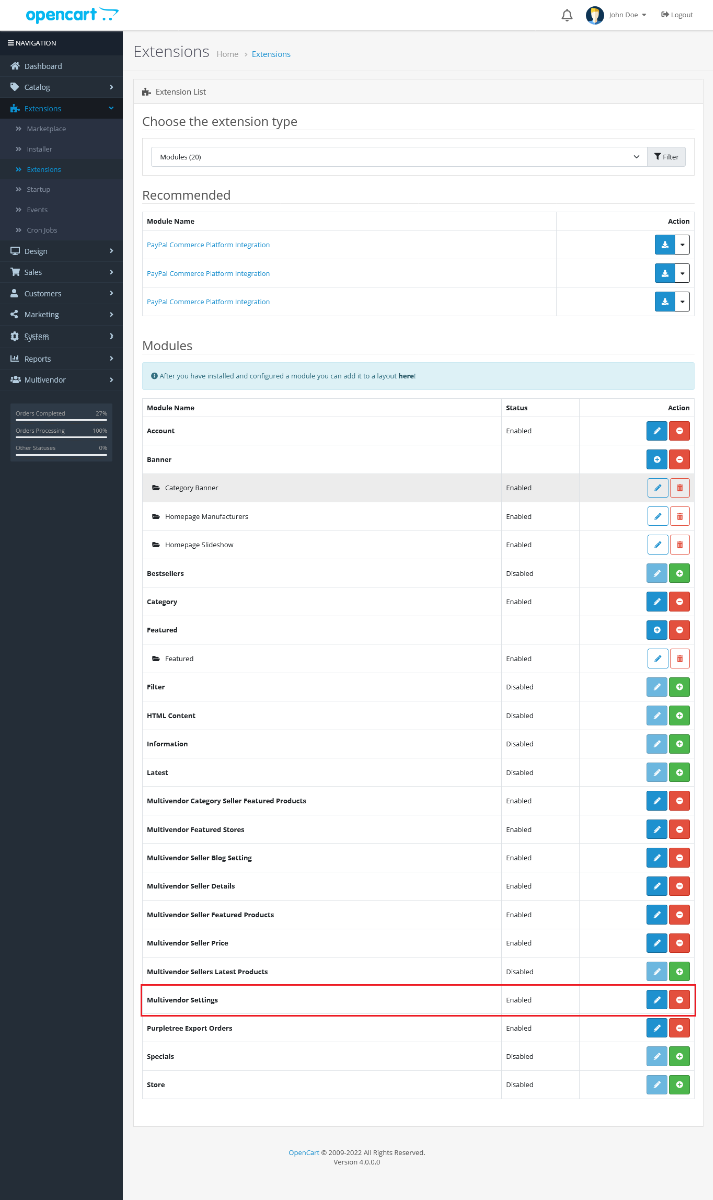
Step 5: Click the green install button next to the module name to finalize activation.
Step 6: Set administrator permissions:
- Go to System > Users > User Group.
- Edit the Administrator group.
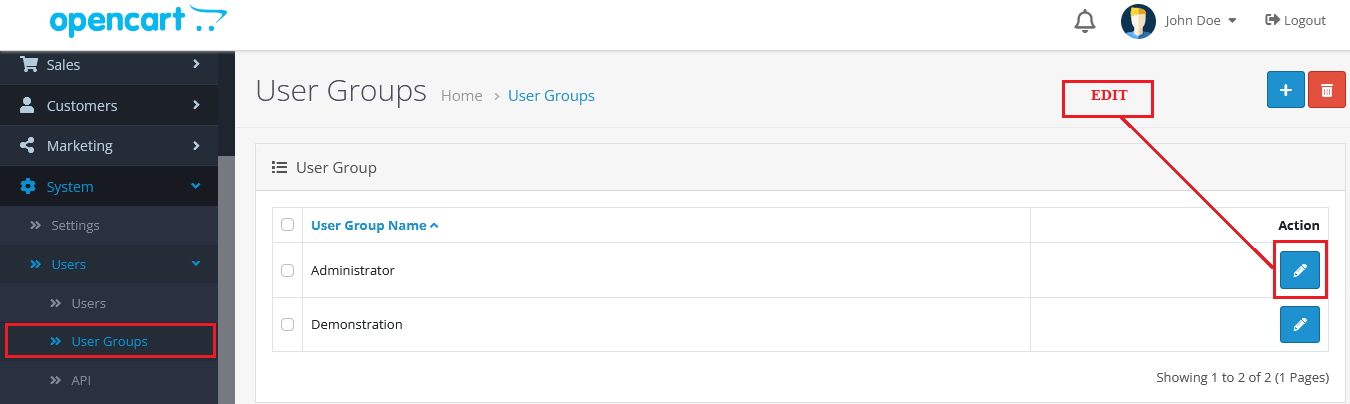
In the "Extensions" section, enable both Access and Modify permissions for the extension.
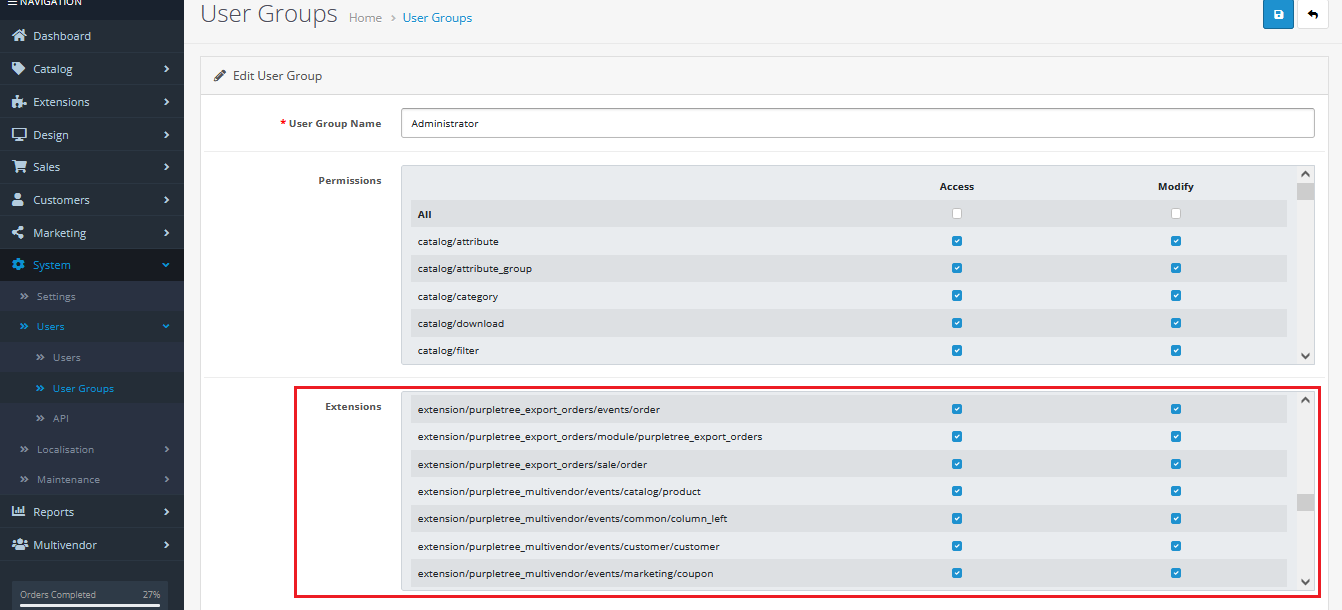
Note: Other extensions may require additional or different permissions. Adjust accordingly.
Important:
Follow the above instructions carefully to ensure proper installation and functionality across all OpenCart 4.x.x.x versions.