How to Implement Category Icons in OpenCart Mobile App
If you're running an OpenCart store and want to enhance the user experience of your mobile app, adding category icons is a great feature to implement. Icons offer visual navigation, make the interface more intuitive, and give a polished look to your application.
In this blog, we’ll walk through how to implement category icons in your OpenCart mobile app.
Why Add Category Icons?
- Visual Appeal: Icons make the app look cleaner and more modern.
- User Experience: Users can quickly identify and browse categories by icons.
- Brand Identity: You can customize icons to match your theme and niche.
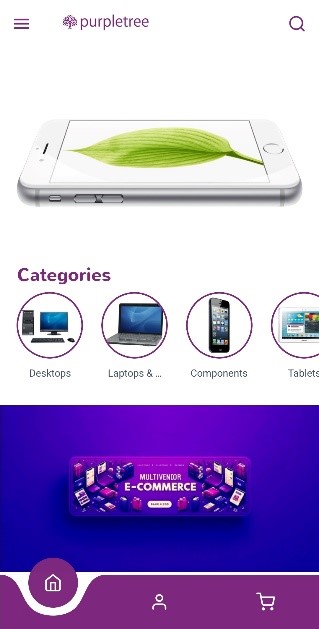
Step 1: Add a new Category
- Go to the Admin panel and log in
- Go to the catalog option
- Go to the category and click on Add New
- Give name, add product, and give an Icon which is displayed on the frontend side of the Application
- Click on Save
![]()
Step 2: Add your category to the Categories Module
- Go to the Extensions > Extensions
- Select Modules from the dropdown
- Go to categories and edit
- Add your category to the list
- Click on Save
Step 3: Add Categories to the App
- Go to Design > click on Layout
- Search Purpletree Mobile App Home and click edit
- A layout screen is displayed as under
![]()
- Add new and select categories from the dropdown
- Click on Save
- Change only Content Top, don’t add anything on Content Left or right.
Step 4: Test the Feature on Frontend
- Icons load properly for each category
- While clicking on the icons right product list should be open
- The design looks consistent across screen sizes
- Icons do not slow down app performance
Conclusion:
Adding category icons to your OpenCart mobile app not only enhances the design but also improves usability and customer engagement. With a few admin-level changes and simple design updates, you can deliver a polished and modern experience for your app users.