How to set the Seller panel and Seller price Module in Journal 3 Theme

Note: This is an old article. The seller panel and seller menu are no more a part of the frontend theme. Sellers have their own dedicated panel.
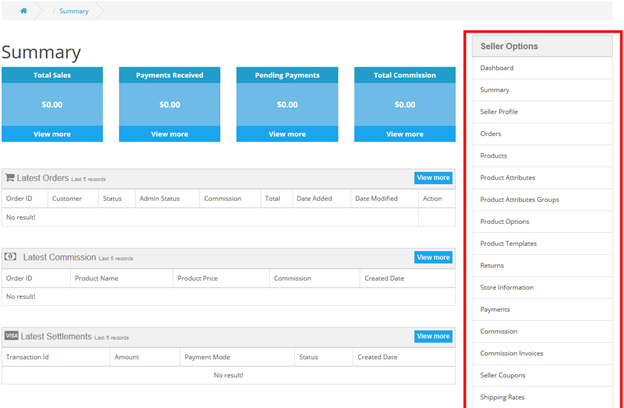
Opencart Multi-Vendor Marketplace from Purpletree provides many modules for the Opencart store. Seller panel and Seller price are very important modules for Seller in the Opencart store. The seller panel also called the seller menu list. All seller menus are present in this list. The seller panel shows all seller page on the right side. The seller panel helps the seller, switch one page to another page. The seller panel looks like a customer menu.
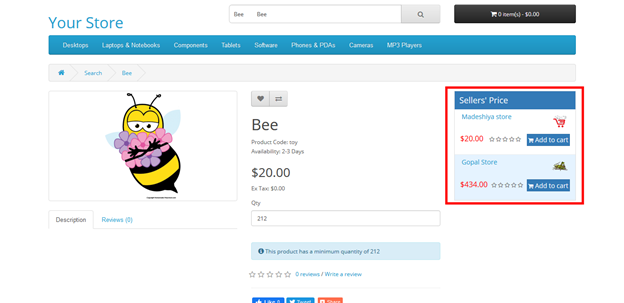
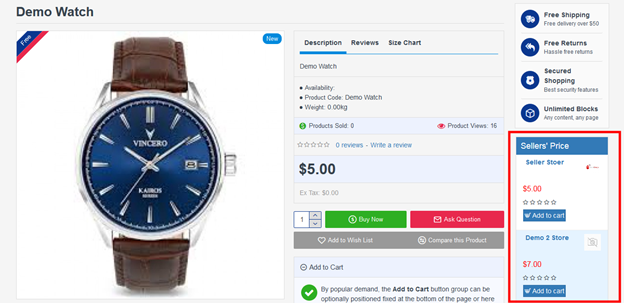
The seller price module is used to show the template product price. The seller price module only set on the product detail page. The seller price module only shows when “Use Product Templates” is set yes in Purpletree multivendor settings. Seller price module show seller information and price like seller store name, store rating, store logo, product price and add to cart button.
How to Set Seller panel in Journal 3 Theme
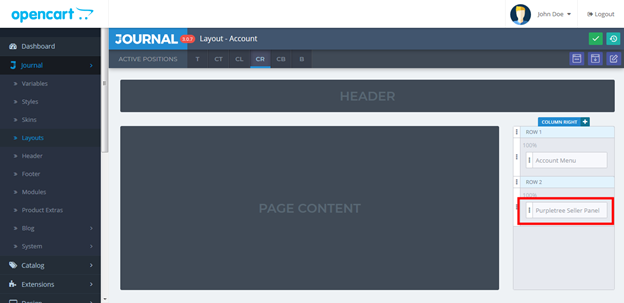
First of all, install “Purpletree Multivendor extension successfully” with the help of the user guide of Purpletree multivendor extension. Go to the Journal option in the admin Navigation menu. Click on it and select the layout. After that, you will reach to Journal 3 layout page. Select “Account” and edit. Go to column right and click the add row button. After that, the new row is added. Thereafter go to the newly added row and click on “Add…” text.

After that My Modules popup is opened. Go to My modules popup and select Opencart. When you click on the Opencart menu, then all Opencart modules list is opened. Thereafter select “Purpletree Seller Panel” and click on it.

After that “Purpletree Seller Panel” is set on the account page layout column right section.
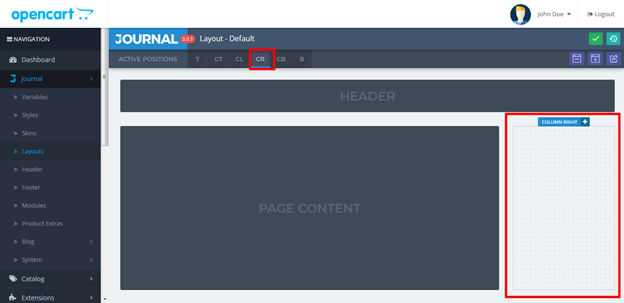
If the Seller panel is not visible on the seller page then go to the Journal option in the admin Navigation menu. Click on it and select the layout. After that, you will reach on Journal 3 layout page. Select “Default” and edit. Thereafter go to “CR” (column right).
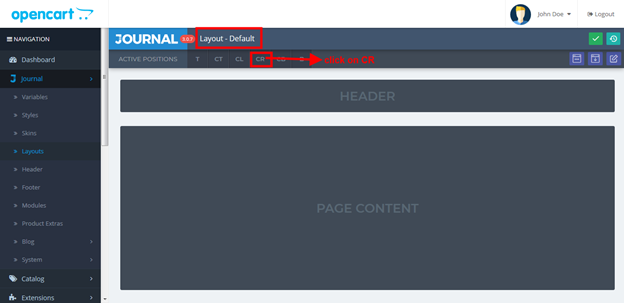
After that column right is added.
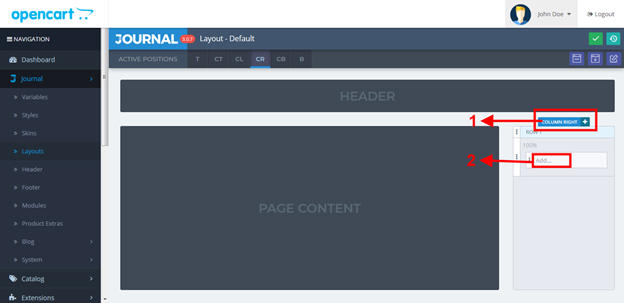
Go to column right and click the add row button. After that, a new row added. Thereafter go to the newly added row and click on “Add…” text.
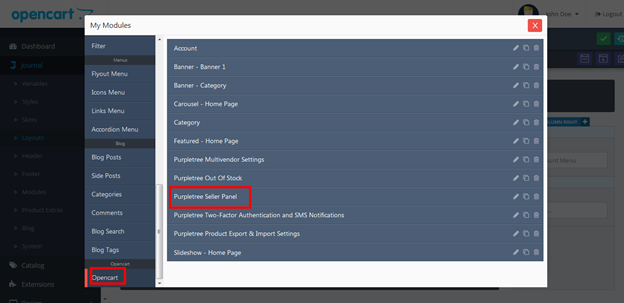
After that My Modules popup is open. Go to My modules popup and select Opencart. When you click on the Opencart menu, then all Opencart modules list is open. Thereafter select “Purpletree Seller Panel” and click on it.
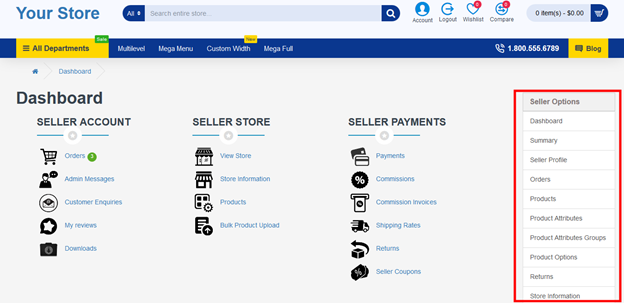
After that “Purpletree Seller Panel” set on the account page layout column right section.

The seller panel look like bellow screenshot
How to Set Seller price module in Journal 3 Theme
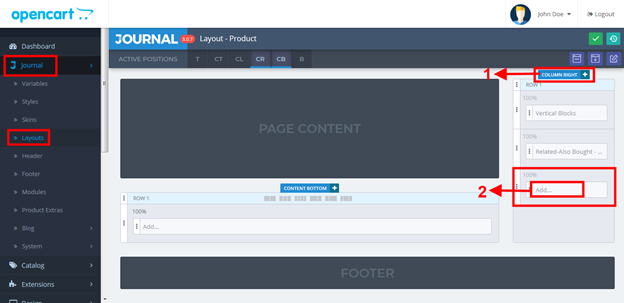
Go to the Journal option in the admin Navigation menu. Click on it and select the layout. After that, you will reach on Journal 3 layout page. Select product and edit. Go to column right and click add row button. After that, a new row is added. Thereafter go to newly added row and click on “Add…” text.
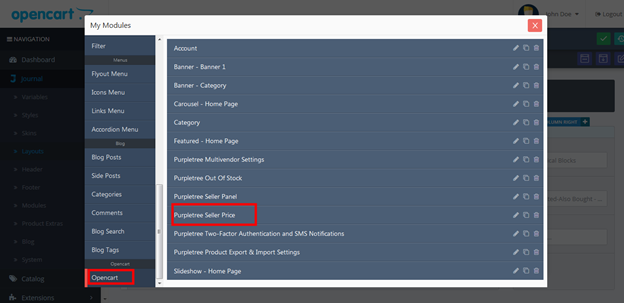
After that My Modules popup is open. Go to My modules popup and select Opencart. When you on the Opencart menu, then all Opencart modules list is open. Thereafter select “Purpletree Seller Price” and click on it.
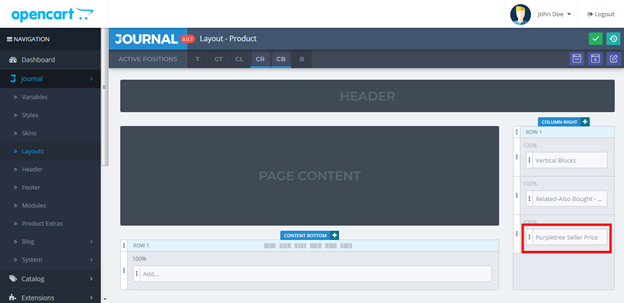
After that “Purpletree Seller Price” is set on the account page layout column right section.
The seller Price module looks like bellow screenshot
More details of the Purpletree Opencart Multivendor marketplace can be found here.