How to add/edit Stores in Storelocator for Magento

Magento Storelocator allows admin to add physical stores with additional information such as contact info, website, tags, images, the working hours schedule .Stores can be browsed on Google map.
Admin can add stores from admin panel just login to admin panel and goto Storelocator > Manage Stores. Select the store which you want to edit the store. Select Edit option from dropdown from action column.
Admin can add multiple stores from here by selecting Add new store button. And can change store information from edit button in front of each store. To delete the store just click on delete button in front of each store or you can delete multiple stores just by click on checkbox and then select Delete action from dropdown and

On Edit Store page there are 3 tabs named Store Information, Store Description and Image Thumbnail.
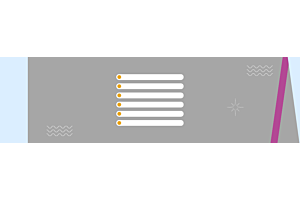
Store Information – In this tabs you have to enter all the basic information of the store, Enter store name, it could be any valid name, on Status field select Enable to activate the store so that it will be visible on frontend, disabling the store will not show this store anywhere on frontend. To view the Single Store view page on click on store on listing page. Select Show View Page to Yes. Latitude and Longitude fields are there to show the exact coordinates on Google maps. Enter Store full address in Country, State, City, Postcode, Address and Phone number.
All the information entered here will be shown on Stores listing page and on View page of store. Please enter Latitude and longitude of the store for better view and usage of our
extension, by entering Latitude and longitude user will get to see the exact location of the store in Google maps.
Phone Number, Latitude and Longitude must be in numeric but all the field are required, you cannot left any field empty on this page.

Store Description – On this tab you have to enter the store description, here you can enter a long description for the store in WYSIWYG editor. By using WYSIWYG editor you can add number styling just by selecting from the editor. This description will be shown on Store view page which has been Selected Yes for Show View Page from store information. This information will not be shown anywhere if particular store Show View Page option is set to NO. Its better to enter description for the store for whom there is lot of information available, as entering short or little description look will not be good. You can also add same information on all stores if all stores are same.


Image Thumbnail
On this tab select the image in browse button and this image will be shown on listing page for seller. If you don’t select image her then default image will be shown for this store which is No image found sample image. So it is better to select image for better view. Click on Save button to save all the information of store.
More details of Multivendor Marketplace for Magento 2 can be found here.